Ribbon noticeboards are a lovely decorative item. I’ve been eyeing a space on my daughter’s bedroom wall that I thought would be the perfect place for one. You can buy these boards in quite a few places, but I wanted something a little more personal.
I also occasionally like doing crafty things.
The advantage of making one yourself is that you can customize it exactly. Choose size, fabric, and ribbon, plus any other touches you may care to add.
If you have a local fabric shop there should be a huge amount of fabrics and ribbons to choose from, so take your pick.
I bought my fabric, buttons, batting, and ribbon in this shop.
Think about the colour scheme of the room where the board will be hung, and also for whom it is intended.
For a child’s room you could pick a brightly coloured pattern, with a contrasting ribbon.
For a grownup room perhaps something more understated and elegant.
Or not. If you like dinosaurs, get dinosaur fabric. No judgement.
My daughter’s room is light purple, and while I thought a pattern might be fun, I wanted the board to last into her teenage years. She might like racing car fabric now, but maybe not when she’s fifteen.
Instead I found a beautiful pale blue chambray, and decided on ivory ribbon for contrast. This looks simple and elegant.
I also wanted buttons where the ribbons cross, which is a pretty typical decoration for these boards.
You’ll see how I approached this later.
This is what you need:
A corkboard – I bought this one which I like because it’s cheap, light and has a cardboard backing, which is important. It’s large, 60 x 90cm, though of course you can use any size you like.
Fabric – enough to cover the board with at least a couple extra inches all the way round.
Batting – this is the soft stuff that makes the board slightly padded. Your fabric shop should stock it. Buy a piece a similar size to the fabric. It will probably come in a few different thicknesses. I used thin batting doubled up so it was nice and padded.
Ribbon – If you’re really organized you can measure the board and figure out how much you need. Or you can just guess, which is what I did, and bought 20 meters. Better too much than too little! I used 5/8″/16mm satin ribbon, but you can use whatever thickness you like.
Buttons – Matching or not. I decided to use lots of different buttons to make the whole thing look a little more fun. Either way, you might want to buy them when you’ve finished the ribbon part of the board, and then you can count how many you need. Or just make a drawing of what you plan to do and count them ahead of time. (I used 37.)
Glue gun – every home should have one. (I have this one.)
Staple gun – ditto.
Needle and thread – I really hope your home has these.
Scissors – ditto.
Pencil and paper
Tape measure
Picture hanging D-rings & cord/wire like these.
Screwdriver & awl
Make sure you have plenty of staples. Remember that staple guns use special staples. I forgot this, ran out halfway through, and had to make an emergency B&Q trip to buy more.
How to make it.
1. IRON YOUR FABRIC.

I mean it. Iron it. Do it right now. You will regret it if you don’t because the fabric will look creased and crap. Just get the bloody iron out.
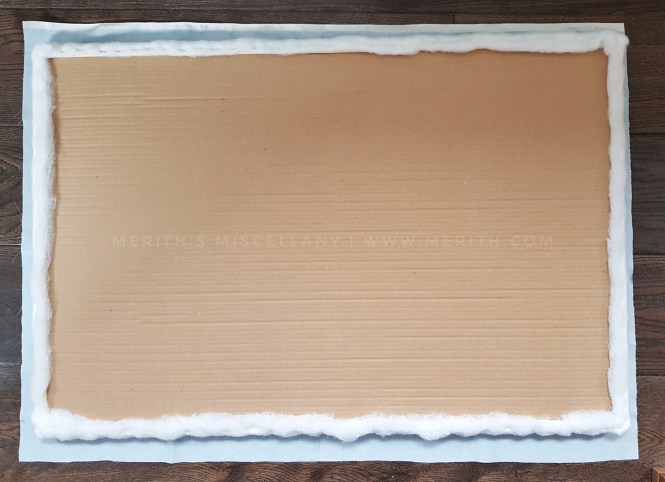
2. Lay out your batting, and place the board on top.

Trim it to fit, you want a couple of inches extra all the way around.
3. Staple the batting to the frame.
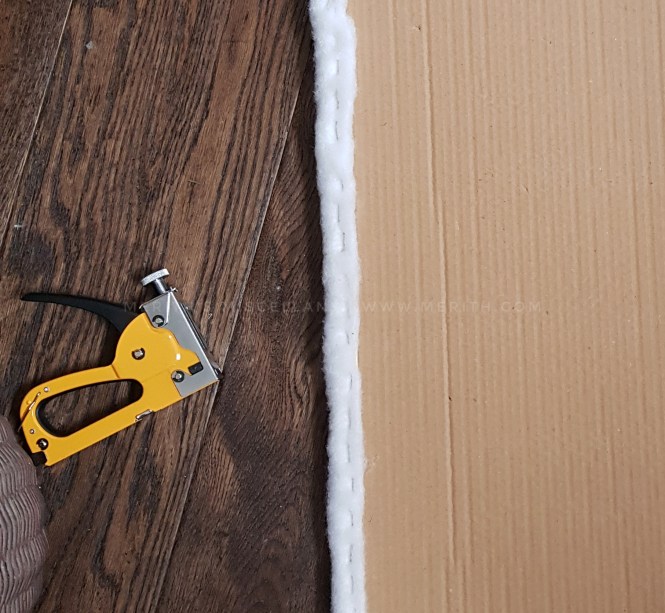
Start from the middle and work outwards.
When you’ve completed one side, staple the opposite side, again starting with the middle.
Make sure you keep the batting nice and tight.
Then complete the other two sides.
4. Lay the padded board on the fabric.
I hope you ironed it at the beginning. If you didn’t, go iron it now.
Again, trim to fit, with a couple of inches extra.
Don’t forget to make sure the outside/pattern side of the fabric is facing the floor!
5. Again starting from the middle, staple the fabric to one side of the board.

Then staple the opposite side.
Make sure you pull the fabric nice and tight.
Staple the other two sides, again making sure the fabric is pulled tight.
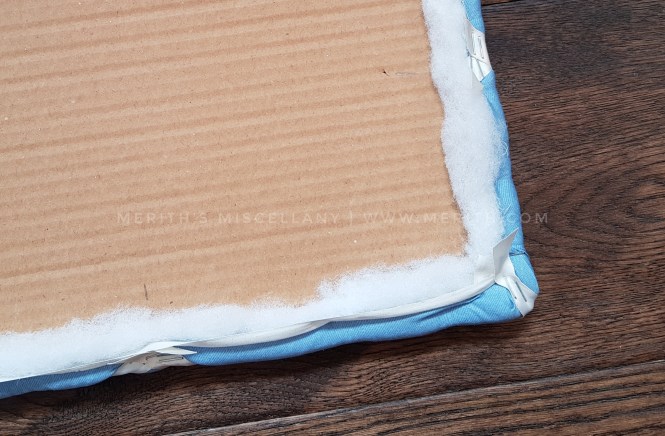
6. Finish the corners.
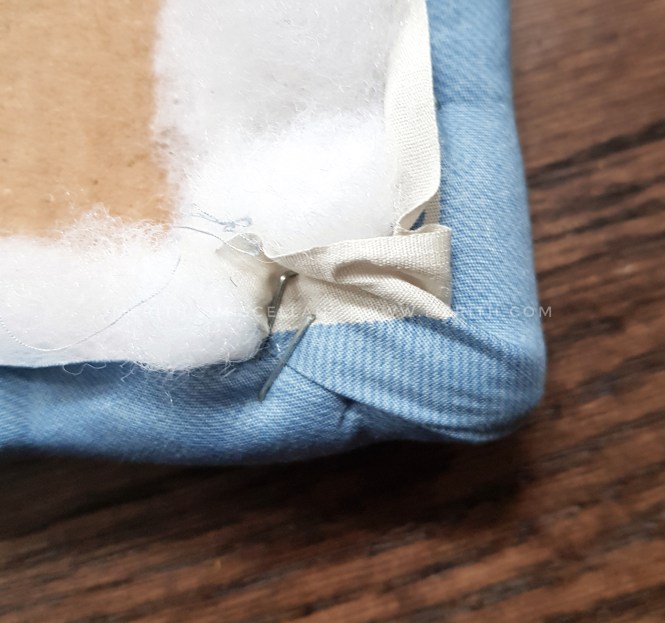
There might be a bit of a wedge of batting here, so feel free to trim it down.
Then fold the fabric like you would a hospital corner, and staple it down.
If you don’t know how to make hospital corners, you’ve clearly been spoiled with fitted sheets. But it’s easy, just look it up online.
7. Figure out your ribbon pattern.
How many ribbon lines you have will depend on the size of your board.
I decided to have corner-to-corner ribbons in the middle plus three on either side, making seven in each direction.
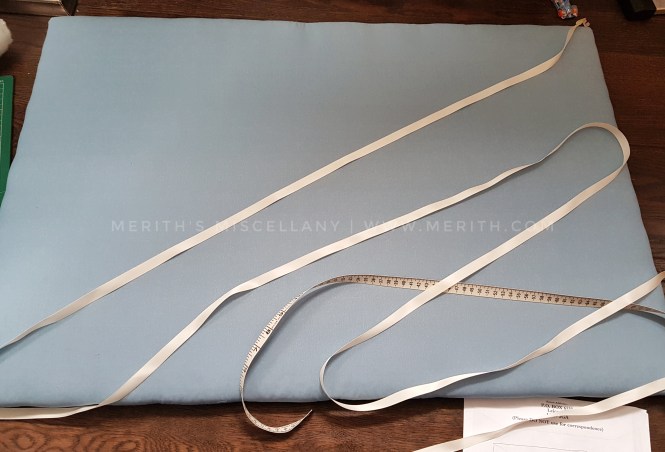
8. Measure up.

It’s time to use your maths skills.
Divide the length of each side into as many ribbon lines as you will have plus one.
With four ribbon stripes (see above) I divided the 90cm side by five which equals 18.

So I made a mark on the reverse of the board every 18cm.
Do the same on the short side of the board. (Here it was 60 ÷ 5 = 12, so marks every 12cm.)
9. Start attaching your ribbon.

Do the corners first.
Staple the end of the ribbon to the underneath corner. Bring it round the front and over the opposite corner.
Pull nice and tight and staple down.

Use two staples, making sure both ends are in the ribbon itself.
Don’t forget to cut the ribbon at an angle so it doesn’t fray.
10. Add more ribbons.
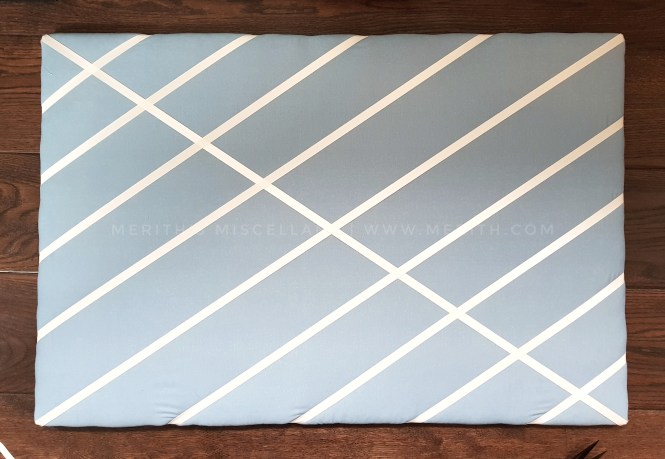
Using your measurement marks, continue to attach stripes of ribbon to either side of the central piece.
The ribbon will need to be at an angle to keep it flat across the board.
As before, use two staples completely through the ribbon, and pull each piece taut.
11. Complete the ribbons in the other direction.
The ribbons should cross opposite your guide marks.
12. When you’re finished, it should look something like this.

13. Add the buttons.
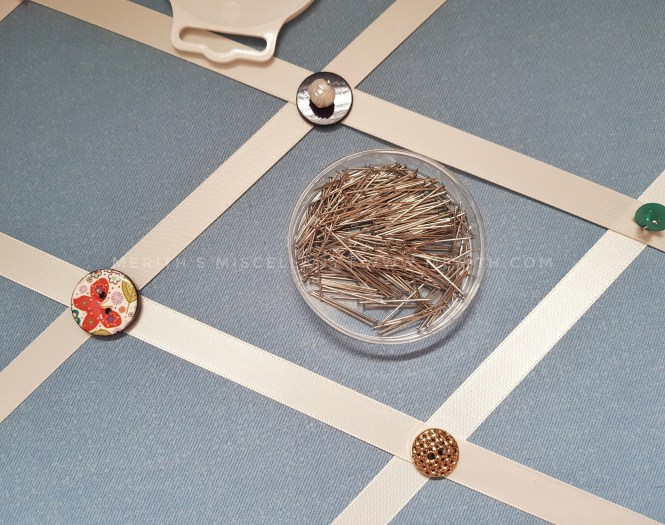
If you’re using different buttons you might want to have a little play with how they’re laid out. Mine were all mismatched, so I used pins to hold them in place while I switched them around to see what looked best.
Once you’re happy, thread your needle and sew them on. (You can use regular cotton thread.)
It’s a little bit awkward, but a needle will go through the cork and cardboard backing easily enough. I only used a couple of stitches for each button, as they’re not going to be under the same kind of strain as a button on a shirt.
Make sure the stitches are nice and tight. The knot on the back of the board doesn’t have to be neat.
You will have to re-thread many times. You will also stab yourself in the finger on more than one occasion.
Don’t get dispirited. You can do this. It’s totally worth it.
14. Secure the knots.
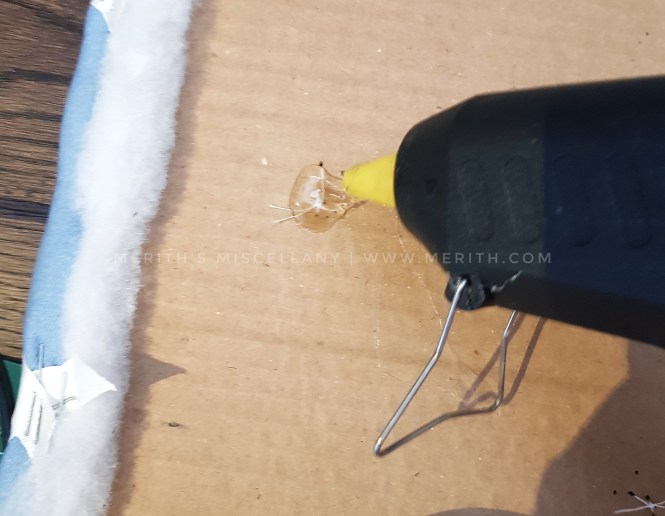
This is where your glue gun comes in.
Put a blob of glue over all the knots behind the buttons. It will stop them from being pulled through and keep the buttons nice and tight where they belong.
It will also take care of any stitches that you didn’t manage to knot properly.
If don’t have a glue gun you could use tape, though it won’t be secure. Seriously, buy a glue gun. They’re cheap and bloody brilliant.
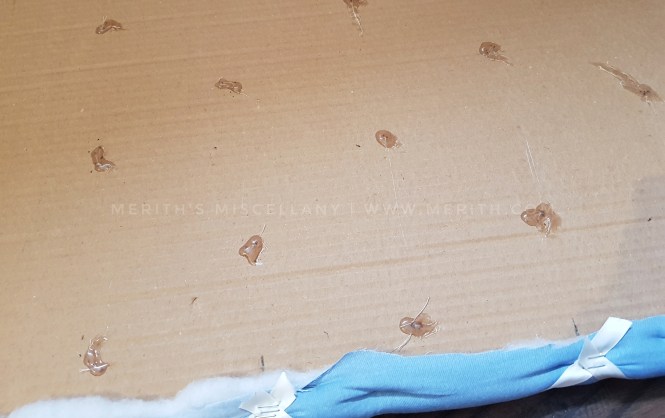
The back of your board will look like it has some strange disease, but it will keep everything in place.
15. Attach a hanging cord.
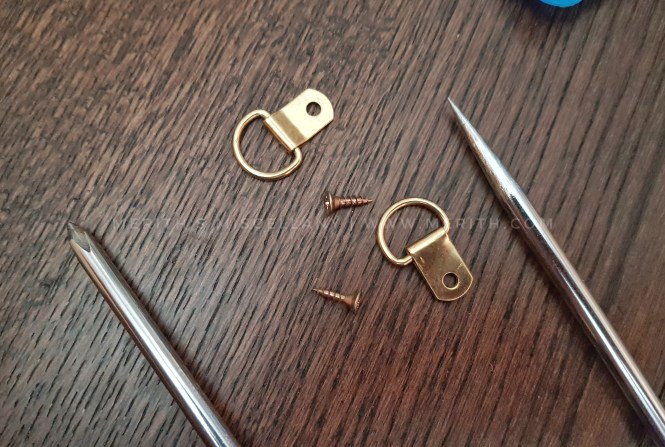
Take two D-rings and their screws.
Use the awl to poke a hole into each side of the frame about a 1/4 of the way down.
You can use your guidance marks if you like. If you’ve measured properly they should be even.
The use the screwdriver to attach the D-rings. The wood should be soft, so it’s easy to do by hand.

Then attach the cord, pulled nice and tight, and knot it firmly.
16. Hang it on the wall and admire your work/post to social media and wait for the compliments to flood in!

Here it is in situ. Looks nice huh?
Here’s a closer look at some of the different buttons I used.
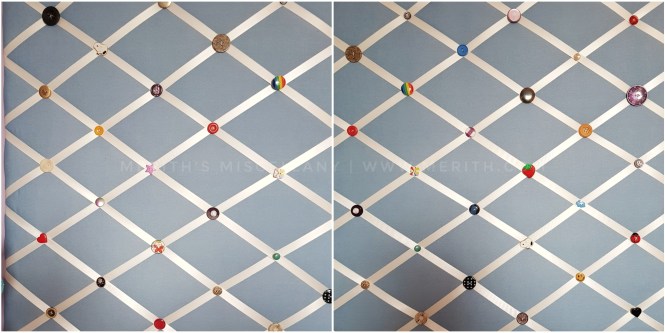
They’re a mixture of random ones from charity shops, plus a few more from the fabric store.
Every one is different, with the exception of two Snoopy head buttons I found in a charity shop for 50p. They were so cool I couldn’t resist using both of them!
I think it adds a little extra visual interest, though I could also have used plain buttons.
If you want something less plain than identical buttons, but not quite out there as mine, you could use two different buttons types and alternate them.
Or how about different colours but the same size, or vice versa.
How much did it cost?
The board was £6.99. The fabric was £4.99 per meter. It had a width of 115cm which was more then enough, so I bought a 3/4 of a meter at £3.75. The ribbon was £5.60 (23p per meter), but I bought too much! The buttons were probably around a fiver in total.
So altogether this cost me a little over £21.
You can buy these boards on Etsy, as well as in various shops. From my googling around, you would spend at least the same amount on one half the size of this one.
So if you have some time, and the crafty inclination, this is a really lovely project.
It was so much easier to do than I thought, and I’m incredibly pleased with the result. And so is my daughter.
I’m hoping it’s something that she will use for many years to come!
**********************************************
Thank you for reading!
Pin this for later, comment and share. You can also find a few other crafty things here.

**********************************************