Reading is awesome. Books are awesome. Anything that encourages kids to read is awesome.
And one thing that I think is essential is to have a nice space in which they can enjoy books.
A few years ago I made a couple of book signposts for Little C’s old school library. I ended up getting them back, and finally got around to hanging them up in her room. Little C is a serious reader, so they’re pretty appropriate decor.
I posted a picture on Instagram, and quite a few people seemed to like them, and wanted to know how I’d made them.
Well, when I made them I didn’t record the process. So what to do?
Make some more of course!
Turns out that Little C’s school librarian was quite keen on having some for the library, which gave me the perfect excuse.
These are my original DIY book signposts. They’re sort of weathered-looking in style.

See? But hey, I was making it up as I went along.
I do like them, but I decided the next lot would have a bit more pizzazz.
That meant more colours, rather than just brown with a few extra touches here and there.
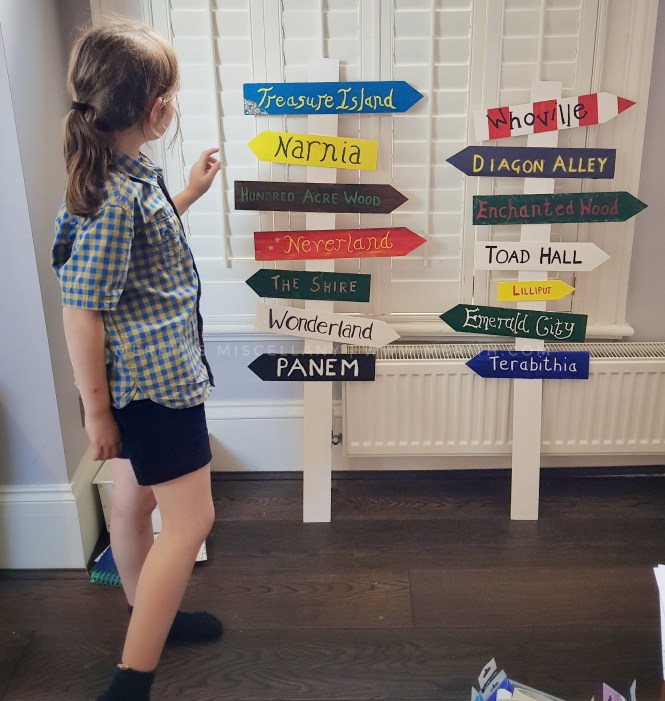
As for the signs, we’re talking places from books, rather than book titles.
I wasn’t sure if I would use the same ones as before, but as it turned out, I only changed a couple.
The age group should suggest which locations will work. Mine are for a prep school library, so I thought a mix of age ranges would be appropriate.
As you can see, I have Panem, from the YA Hunger Games trilogy, but also Hundred Acre Wood. After all, kids who are reading YA novels will still be familiar with Pooh, right?
I also think that the classics are useful. I have no idea if kids now read Treasure Island, but they should. And of course we can’t forget Harry Potter!
Here are a few more suggestions:
Hogwarts, Mr MacGregor’s Garden, Green Gables, Camelot, Wonka’s Chocolate Factory, Grandma’s House, Moominvalley.
There are tons of possibilities!
Which brings me to how I actually made them, and the DIY itself.
This is what you need:
Balsa Wood – I used two packs of this. One pack of 20 x 2.4mm x 100mm (for the posts) and one pack of 20 x 1.6mm x 75mm (for the signs themselves) .
I made two signposts with seven signs each, but had enough left over to make more.
Acrylic paint – these are nice big tubes which will last for for ages.
Foam brushes – for painting the background quickly and easily. This pack has a great selection.
Fine brushes – for the lettering. These or these give you plenty of choice.
Craft knife – it’s the best thing for cutting balsa wood.
Craft mat – to protect whatever surface you’re working on from the blade.
Ruler – a metal one is best, but whatever you have.
Glue gun – because it’s not a DIY craft without a glue gun! (I have this one)
String – every home should have string. Any is fine, as long as it’s not too thin.
Optional:
Accents – glitter paint, sequins, sparkles etc. You don’t have to use these, but depending on which signs you choose they might add a little extra something. You can use regular glitter, but I think glitter paint (or glue) is better than that annoying dry stuff that goes absolutely bloody everywhere.
Masking tape – if you make any stripy backgrounds (like my Whoville sign) it’s much easier if you use masking tape. I also used it to stick newspaper to the floor when I was painting.
How to make it.
1. Make a list of the signs you plan to make.
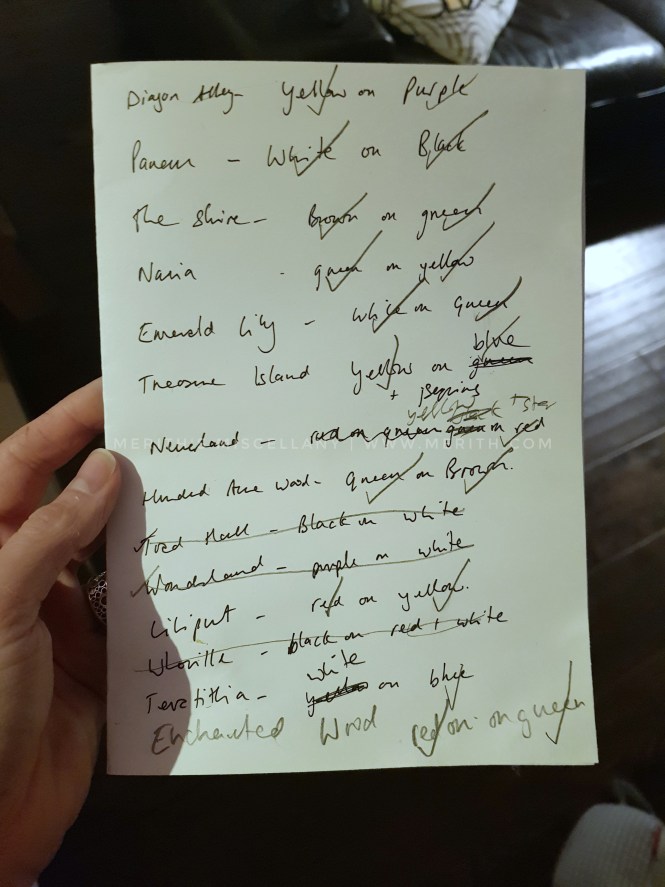
Place names, and the colours you want to use.
Of course you could do them in just black and white, or even brown on natural wood like my original signposts.
But whatever you choose, plan it first, background colours and text colours.
Make sure they contrast and stand out from a bit of a distance.
You can also try colours that are appropriate to the place name. For example, I made Hundred Acre Wood brown on green, and yellow on blue for Treasure Island.
2. Paint your sign boards and post boards white.
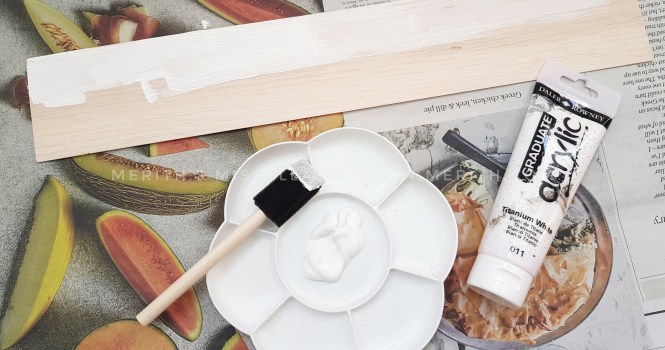
While most of my backgrounds are colours, I know that they will come out better when painted over white rather than the beige/light brown of the balsa wood.
This is what you use the foam brushes for. It’s so much easier than using a regular brush.
Do two coats.
It doesn’t take long, by the time you’ve finished the first coat, they will be dry enough to go over again.
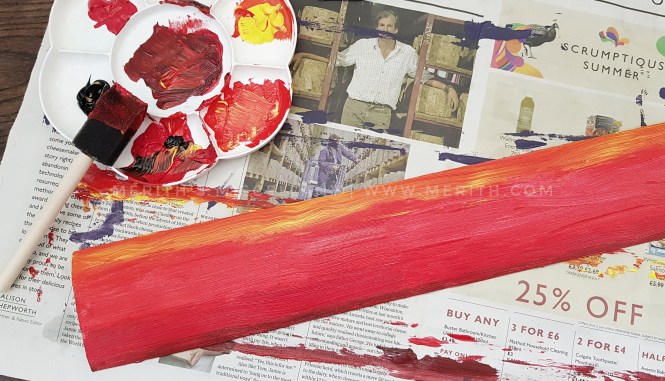
3. Paint your coloured backgrounds.
You can use a foam brush for this as well.

Most of mine are a plain colour, but I made a couple that were a little different.
The one above is red and white striped for Whoville. I just used masking tape to block off white stripes, and painted the gaps in red. Again, I did two coats for extra brightness.
This is my background for Neverland. It’s a sort-of sunset, as it made me think of ‘straight on till morning’.
Yeah I’m fancy.
4. Plan your lettering.
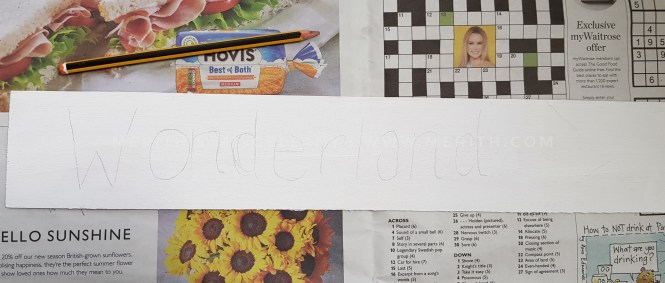
I sketched out my lettering in pencil (it will erase if you aren’t perfect with your painted letters).
You’ll need a space at one end of the board to make the pointed part.
If you can, try to make the word(s) in the middle of the board, so you can choose the direction in which it will point.
Some of them might be too long, but don’t worry, as long as there is a reasonably similar amount that will point the same way. And if you’re concerned about all the longer ones pointing the same way, try writing them from right to left, to leave a space on the left rather than the right.
5. Paint the lettering.

Here’s the first one I did.
See the space on the right? That’s where the point is going to be.
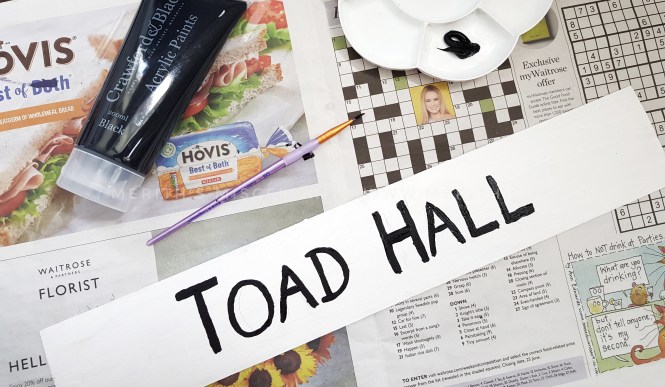
Plain black on white for Toad Hall.
Again, two coats.

When I did this yellow on blue for Treasure Island, I realised that the yellow didn’t pop too well over the much darker blue.
See how it looks in the first picture? Not great.
Using the same principle as the white base coat, I did the lettering in two coats of white first, then put yellow on top.
Much better!
I must also admit that after the first couple I didn’t bother with the pencil guide, I just freehanded them. My lettering isn’t perfect by any means, but I did try to make a bit of variety in the styles.
6. Arrange the order of your signs.
Make sure similar colours are further apart.
You also need to consider which way each sign will point. Again, you don’t want them all pointing the same direction.
I rearranged these SO many times.

Also consider the spacing. You want the seams of the posts to be covered with a sign.
7. Cut the points.
This is what your craft knife and ruler are for.
Don’t forget to do this on your craft mat!
Either measure to make sure they are even, or use guidelines on your craft mat.

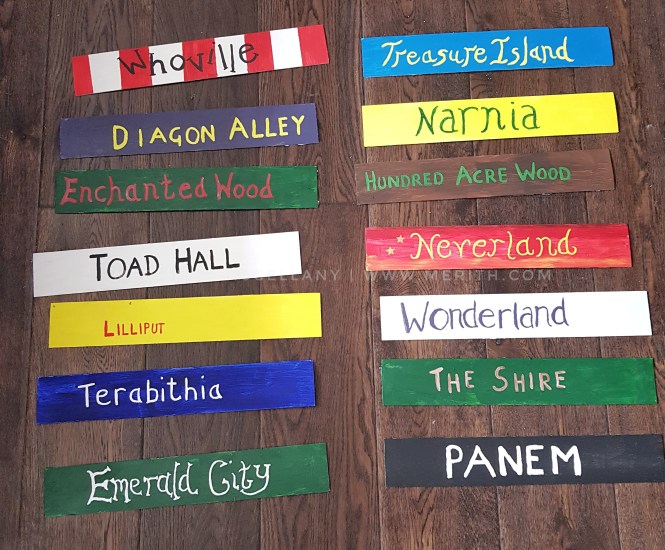
And here they are, all laid out with their points, plus some artistically scattered offcuts.
This gives you a much better idea of how they will end up.
I decided to make the Lilliput sign smaller than the rest, for what I hope are obvious reasons.
8. Add decorative accents.
This is optional! If you don’t want to do this, skip to step 9.

I had some sparkle paint that I added to the Enchanted Wood (silver) and Diagon Alley (gold).
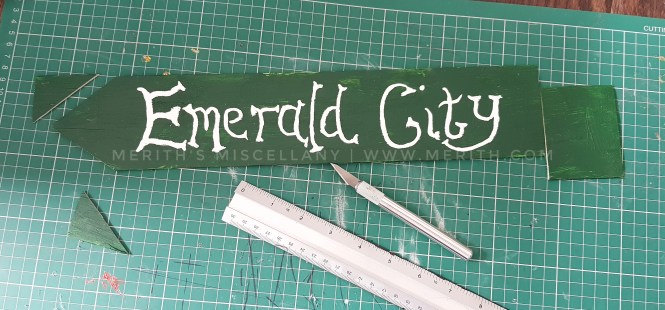
Also I used green glitter glue for Emerald City.
And I got super-fancy with Treasure Island!

I had some sparkly flat-backed jewels and big gold sequins, so I glued them onto a corner like a little pile of treasure. Then I added a tiny bit more silver and gold sparkly paint around it.
It looks quite effective, if I do say so myself.
9. Assemble your signpost.

Use offcuts of balsa wood to glue your pieces of signpost together.
Glue them on the back, obviously.
10. Attach your signs.
Make sure they’re reasonably spaced.
Don’t forget to cover the joins in the signpost!
You can make them all beautifully level, or angle them. I made Whoville point slightly up, and Wonderland point slightly down. The rest just went on as they did, I didn’t use a spirit level or anything.
Depending on how many signs you’ve made, you might find the post is too long. Just grab your craft knife and mat and trim it down as you like.
11. Make a hanging loop.

Cut a piece of string, make a loop, and glue it to the back of the post near the top.
Cover it with another piece of balsa wood for extra security.
Though balsa weighs practically nothing, they’re unlikely to come off.
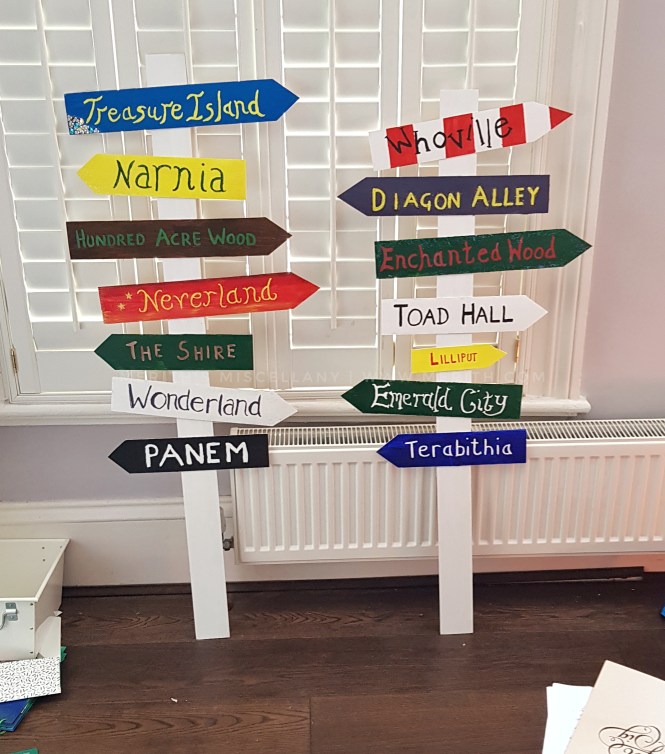
And you’re done!
Stand back and admire your work.
Or get someone else to admire it. Even more satisfying.
How much did it cost?
The balsa wood was by far the most expensive item, costing a little over £25. But I had enough over for one more signpost and another six signs. The foam brushes were £1, and the paintbrushes were £2.99.
If you don’t want to shell out for balsa they could be made from cardboard. But they would be very flimsy and wouldn’t last long, so I wouldn’t recommend it.
I already had the paint, but it costs £2 per tube and you won’t use much except for the white. I also had the accents, but you can find things like that for very little, and you’ll be able to add them to your crafting stash. If you’re a crafty person you’ll probably already have a glue gun and paints.
So I’d say it cost less than £30, allowing for items you own.
I don’t know if you can buy these ready made. Possibly on Etsy, they seem to sell everything there.
But I think it’s totally worth the money and the time. A literary book signpost is a wonderful decoration, and would look good in a child’s room, library, or classroom.
I also have a couple of additional ideas/suggestions.
Rather than making a separate signpost, you could paint the post on the wall and stick the signs on, like a slightly 3D mural.
You could make smaller book signposts using paint pens.
If you’re a super-crafter, you could make the lettering using a Cricut machine. Then you could use fancy fonts, like the Harry Potter lightning font. But hey, I don’t have a Cricut, and I like the handmade look.
Whatever you decide to do, this is a really fun project. It’s creative and colourful, and the final result looks marvellous!
**********************************************
Thank you for reading. Tell me your favorite book in the comments, and your ideas for other signs!
Pin this for later and share.
You can also find a few other crafty things here.

**********************************************